Linux DNS Configuration
Console Configuration
Linux DNS Configuraiton via the CLI is the most commonly used method of configuration.
Step 1
Log into the server and su – to root, perform the following commands by replacing 1.1.1.1 and 2.2.2.2 with the DNSFlex closest DNS Servers :
# echo “nameserver 1.1.1.1” > /etc/resolv.conf ; echo “nameserver 2.2.2.2” >> /etc/resolv.conf
Step 2
Validate a DNS query by performing the following command:
# dig google.com
GUI Configuration
Step 1
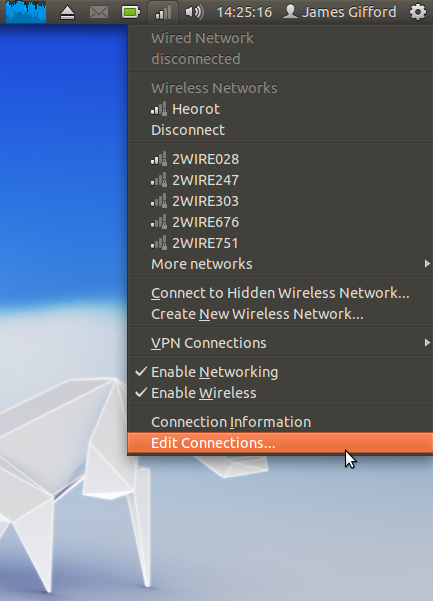
Navigate to the network manager icon in the menu bar, click the Edit Connections... item.
Step 2
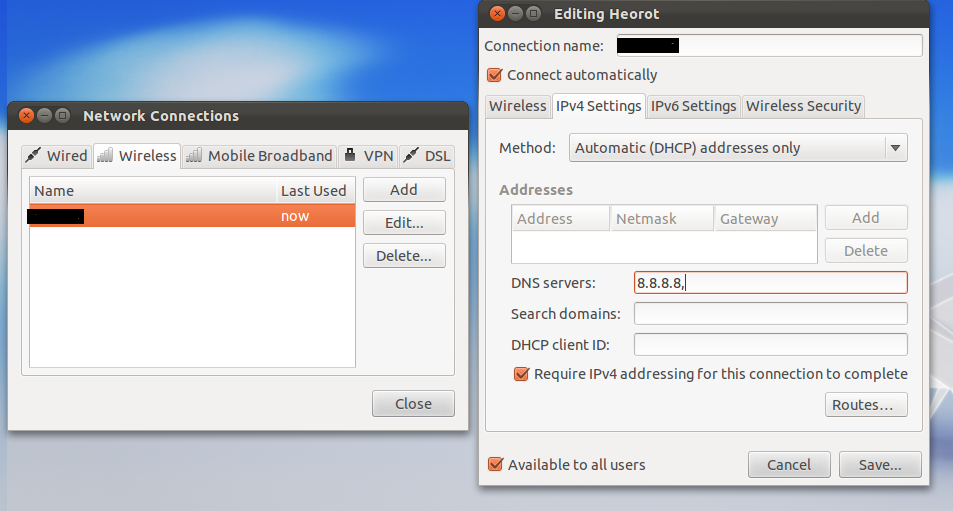
Switch to the “Wired” or “Wireless” tabs, depending on your use case. In this example we will use the “WIFI” Connection
Step 3
Select the name of your network, and click Edit...
Step 4
Switch to the IPv4 tab, and then change it from automatic DHCP to Automatic (DHCP) addresses only
Step 5
Enter the two closest DNSFlex Servers in this field seperated by commas

Step 6
Click save, and you’re done!


