


How to Route Web Traffic from your PC Internet Browser (Firefox) securely through a SOCKS5 Proxy + SSH Tunnel
NOTE: We no longer support SSH Services
The Mozilla Firefox browser includes built in support for basic SOCKS5 tunnelling without authentication. This gives us the flexibility to route web based traffic to a remote SOCKS5 Proxy server every time you open your browser in search of the inter-webs.
Note: Before beginning you must be subscribed to DNSFlex “Total Security” to gain access to a SOCKS5 Proxy server. If you havent done so already, log into the dashboard to create a username and password. These credentials are applicable to both SSH and SOCKS5 authentication.
Technical Level
- Beginner – Moderate
Prerequisites
Pros
- Easy to setup in minutes
- Does not affect internet speed for your other applicaitons
- No software to install
- Masks your source IP and Geographical Location
- Data Encryption with option to proxy DNS UDP traffic
Cons
- Encrypted data will slow down your network connection due to overhead and compression
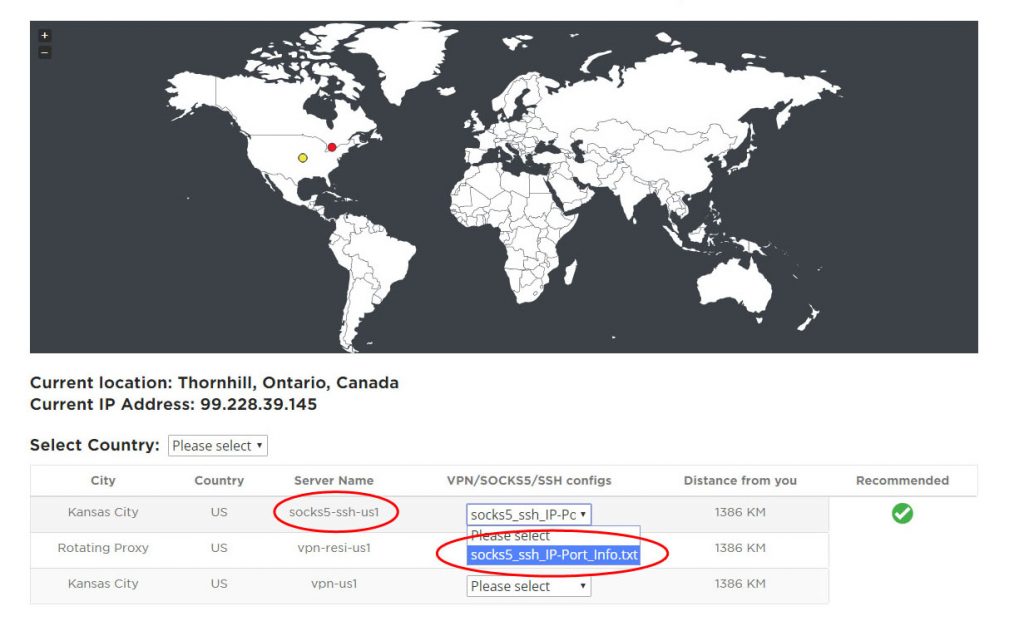
Before you begin – DNSFlex SOCKS5 and SSH Server information
To find the closest SSH and SOCKS5 server location, visit our Server Map page here. SSH and SOCKS5 IP and Port information can downloaded be selecting “socks5-ssh-{country}”
Windows Users
Step 1 – Create SSH Tunnel
PuTTY is amongst the most popular application. It is a lightweight opensource SSH and Telnet client capable of running local dynamic port forwarding with a SOCKS5 listener.
1.1. If you haven’t downloaded PUTTY yet you can fetch it here. PuTTY runs as a live application and does not require an installation directory.
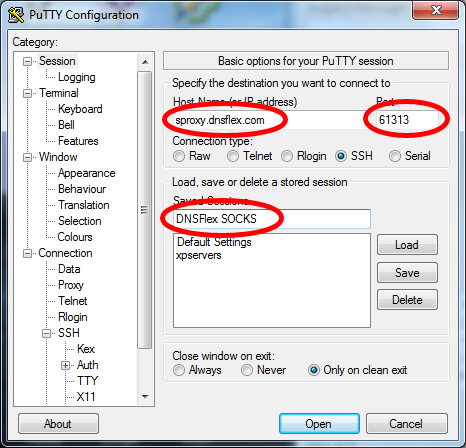
1.2. Start up the PuTTY application and navigate to the “Session” Category. Enter the following information:
- Host Name: (DNSFlex SOCKS5 Server Hostname)
- Port: 61313
- Saved Sessions: DNSFlex
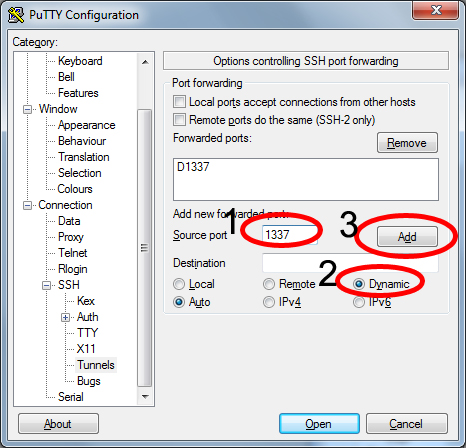
1.3. Navigate to “Connection” -> “SSH” -> “Tunnels“
1.4. Enter “Source Port” 1337
1.5. Click on the “Dynamic” radio button
1.6. Click on “Add” source port
1.7. Navigate back to “Sessions” -> “Saved Sessions“. Enter a name and click “Save“
1.8. Click on “Open” to start the SSH session. You will be prompted for your DNSFlex username and password to complete authentication.
1.9. You can now minimise the PuTTY window but do not close it, we want to keep the connection open for our next steps.
MAC OSX Users
Step 1 – Create SSH Tunnel
1.1. On your local computer, create an SSH key. If you already have an SSH key, you can use that one. As you set up the key, make sure you add it to the authorised keys for the sudo user on the server (in this example, that’s the sammy user).
1.2. Open a “terminal” program on your computer. On Mac OS X, this is Terminal in “Applications” -> “Utilities“.
1.3. Set up the tunnel with this command:
Explanation of arguments
- -D: Tells SSH that we want a SOCKS tunnel on the specified port number (you can choose a number between 1025-65536)
- -f: Forks the process to the background
- -C: Compresses the data before sending it
- -q: Uses quiet mode
- -N: Tells SSH that no command will be sent once the tunnel is up
- -p: Tells SSH what destination server port to connect to
Be sure to replace sammy@example.com with your own sudo user and server IP address or domain name. Once you enter the command, you’ll immediately be brought to the command prompt again with no sign of success or failure; that’s normal.
1.4. Verify that the tunnel is up and running with this command:
You should see a line in the output like:
foobar 14345 0.0 0.0 2462228 452 ?? Ss 6:43AM 0:00.00 ssh -D 61313 -p 61313 -f -C -q -N [email protected]
You can quit your terminal application and the tunnel will stay up. That is because we used the -fargument which put the SSH session into the background.
Note: If you want to terminate the tunnel you’ll have to grab the PID via ps and use the kill command, which we’ll show you how to do later.
Step 2 – Configuring Firefox to use a SOCKS Proxy
Once you have your tunnel established we need to forward web traffic from the Firefox browser into the tunnel using the SOCKS 5 protocol. Keep in mind that the PuTTY client must be running in the background in order for the browser to work once these settings are applied.
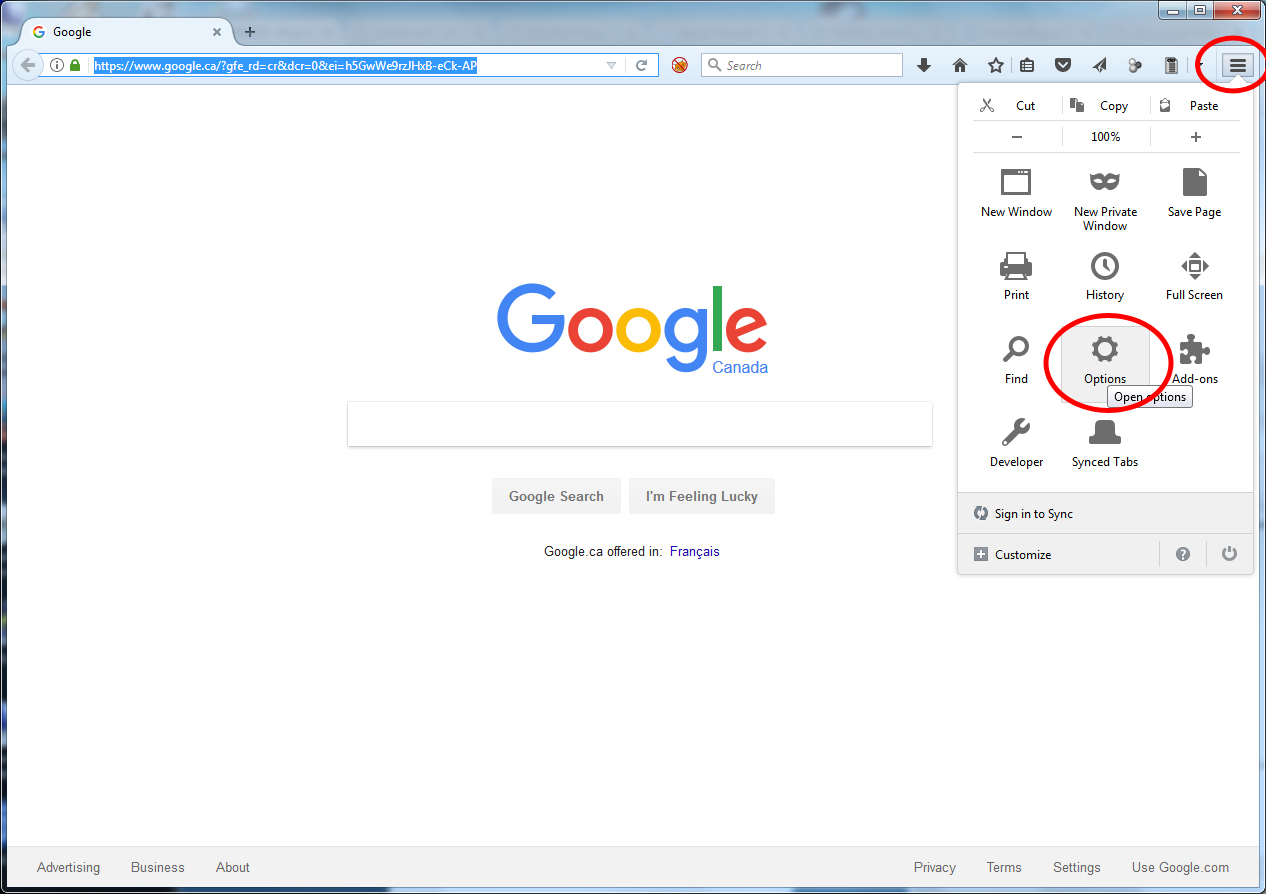
2.1. Spin up your Firefox browser and select the “Menu” on the far right corner of the screen then click on “Options“.
2.2. Now that you are in the menu, navigate to “Advanced” -> “Network” -> “Settings“
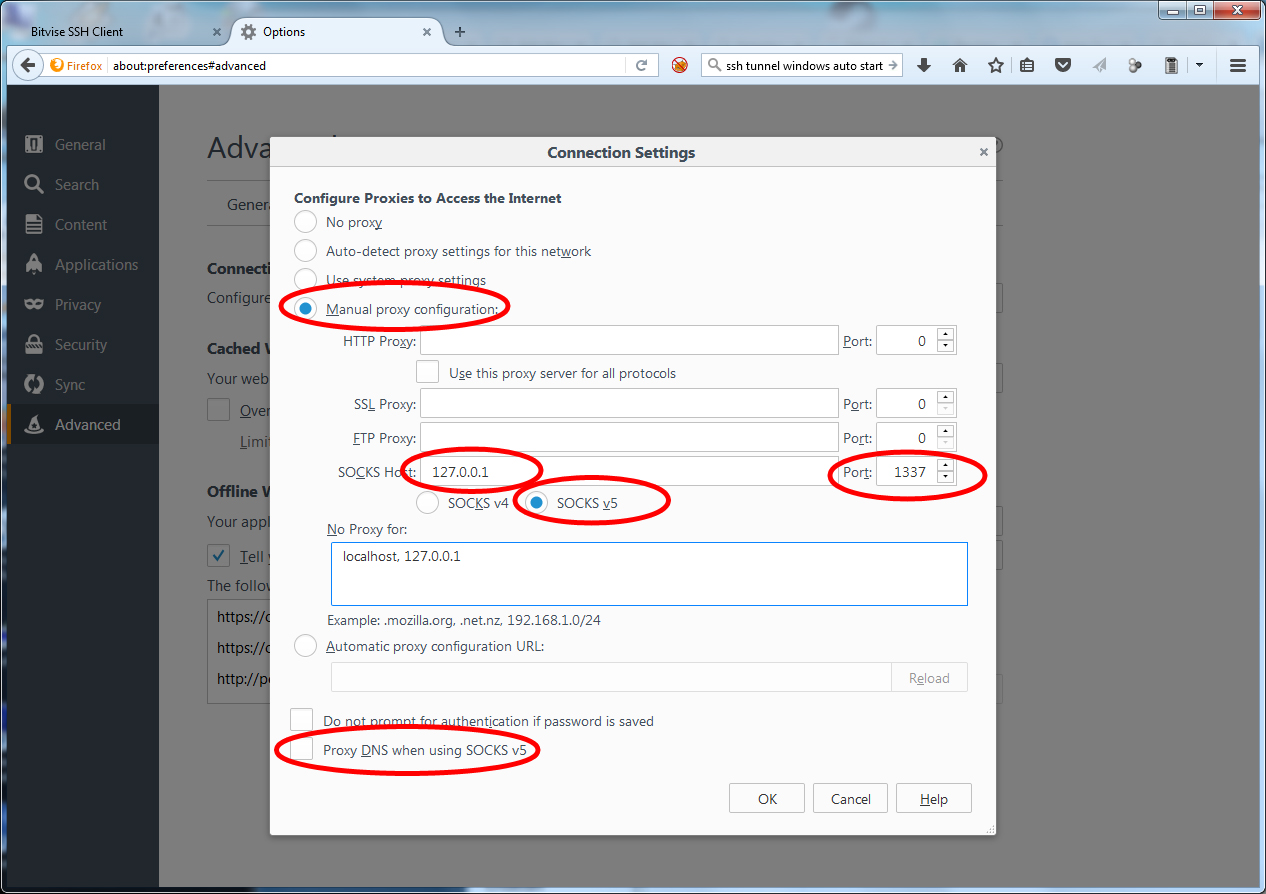
2.3. In the next screen you will enter the Proxy configuration information.
- Check the radio button beside “Manual proxy configuration“
- SOCKS Host: “127.0.0.1”. (This is the local host address PuTTY is configure to listen on and forward SOCKS requests
- SOCKS Port: “1337”
- Proxy DNS when using SOCKS 5. Be mindful when applying this setting; if you choose to, all DNS traffic will be routed through the tunnel making your DNS traffic appear as if it was originating from the Proxy server. Yes you eliminate the risk of DNS UDP leaks however, by doing so DNSFlex Advanced DNS filtering and Parental controls will no longer function properly.
2.4. Click “Ok” to save your settings. That’s it, you’re done! You can verify connectivity to the proxy tunnel by visiting http://whatismyip.com and note the IP has been updated.