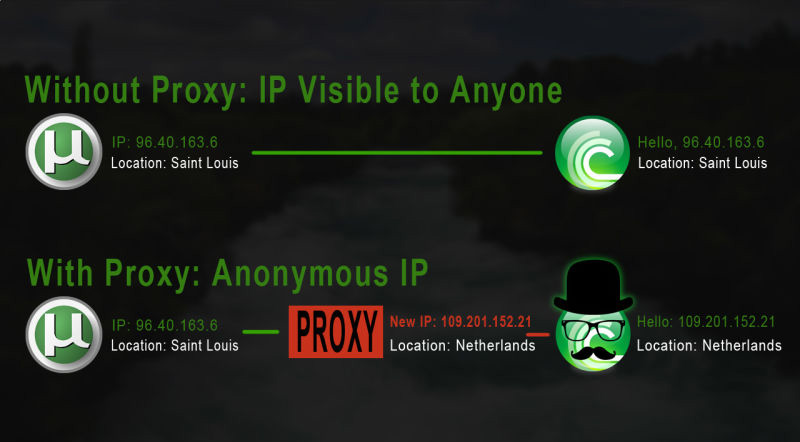
How to Route Application Specific Bit Torrent (Utorrent) Traffic securely through a SOCKS5 Proxy
This tutorial will provide instructions on how to route bit torrent application specific traffic through a SOCKS5 Proxy server.
Note: Before beginning you must be subscribed to DNSFlex Total Security to gain access to a SOCKS5 Proxy server. If you haven’t done so already, log into the dashboard to create a username and password. These credentials are applicable to both SSH and SOCKS5 authentication.
Technical Level
- Beginner
Prerequisites
Pros
- No Software to install
- Masks your source IP and Geographical Location
- Does not affect speeds of other applications running on the same OS
- Super fast downloads
Cons
- No Data Encryption
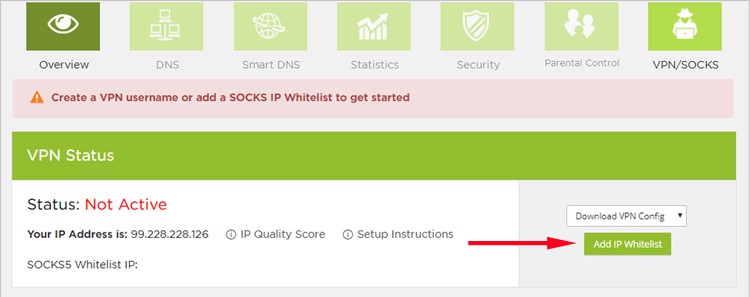
Step 1 – Add SOCKS Authorised IP’s
Log into the DNSFLEX members area dashboard here and add the IP address’s of the device you want to use to access the SOCKS proxies.
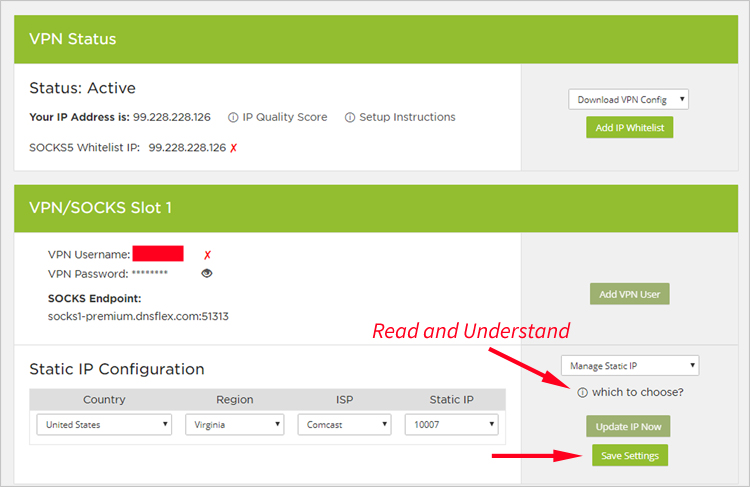
Step 2 – Choose your IP Type
This section allows you to choose what type of IP you want your SOCKS endpoint to connect to. Please read the pop up article “which to choose” to fully understand the different use cases in order to make the correct choice.
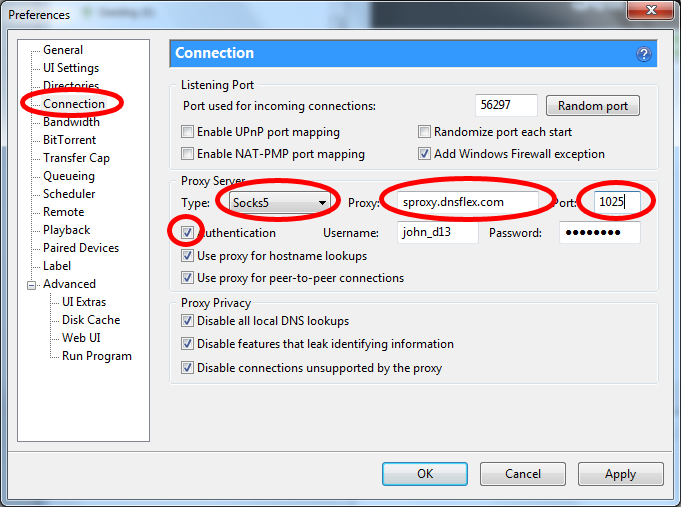
Step 3 – Configure SOCKS5 Proxy server in UTorrent
3.1. Fire up the uTorrent application on your PC and navigate to “Options” -> “Preferences“

3.2. Next, select “Connection” from the left navigation menu and enter the following information:
- Proxy Server Type: SOCKS5
- Proxy: proxy.dnsflex.com
- Port: 51313
- Authetication: enabled
- Username: (Leave Blank)
- Password: (Leave Blank)
Step 4 – Create auto restart scheduler for uTorrent (bug with SOCKS5 connection timeout)
As of the publishing date of this tutorial our version of uTorrent (3.5 build 43916) experience persistent issues with connection timeouts when trying to connect to trackers or peers. There seems to be a known issue in the community in part due to the way uTorrent handles socket transactions to the SOCKS5 proxy server. A stale connection must be dropped by simply restarting the uTorrent application before being able to connect following a previously successful connection.
As a workaround, we put together a process to automatically restart uTorrent using Windows Scheduler service.
4.1. From your Windows desktop open notepad and create a batch file named “utorrent-reload.bat” with the following contents:
start C:\Users\foobar\AppData\Roaming\uTorrent\uTorrent.exe /minimized
4.2. Save the file to a preferred location. For example we saved it in “C:\Users\username\Documents\utorrent-reload.bat“
4.3. From your Windows desktop, right click “My Computer” and select “Manage“
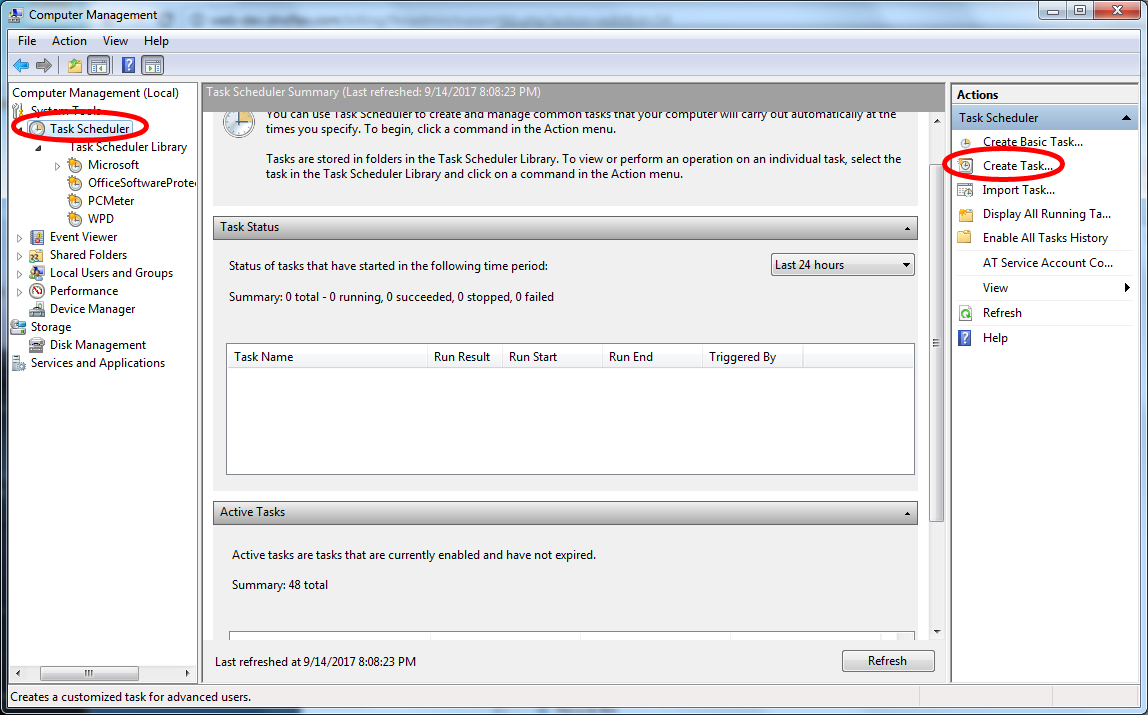
4.4. Select “Task Scheduler” from the “System Tools” Category
4.5. Locate the “Actions” menu category on the far right of the screen and select “Create Task“
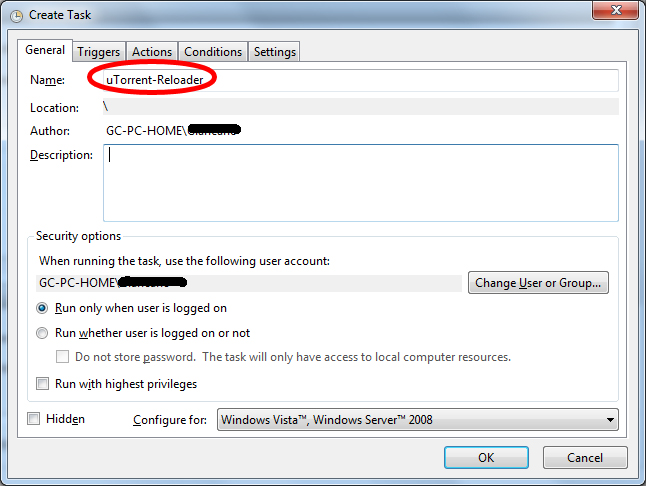
4.6. Select the “General” tab and name your task “uTorrent-Reloader”
4.7. Next, select the “Triggers” tab then click “New”.
4.8. Enter the following information to create the new trigger:
- Begin the task as: On a Schedule
- Settings: Daily
- Repeat task every: 4 hours (configurable)
- For a duration of: Indefinitely
- Enabled: true

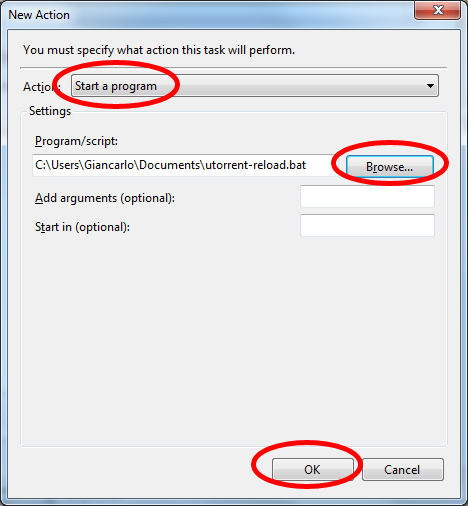
4.9. Next, select the “Actions” tab and click “New“. From the Action drop down menu select “Start a program” then browse for the script you created in step 2.2 – “C:\Users\username\Documents\utorrent-reload.bat”
4.10. Click on “OK” to save your new scheduled task
Validation
From the Task Scheduler Library run your new task to ensure its configured properly and the program starts up correctly. You will see a uTorrent icon on the system tray once it starts running. To run the task simply right click and select “run“.


