


TP-Link Router DNS Configuration
Before starting, please take note of your current DNS server IP’s in the event you would like to revert back to the default settings. Follow these simple guidelines in order to get your TP-Link Router setup with DNSFlex in no time!
Step 1 – Login to Router
Open a web browser and enter your routers IP Address into the address bar in order to access the network settings page. This address is typically http://192.168.0.1 or http://192.168.1.1.
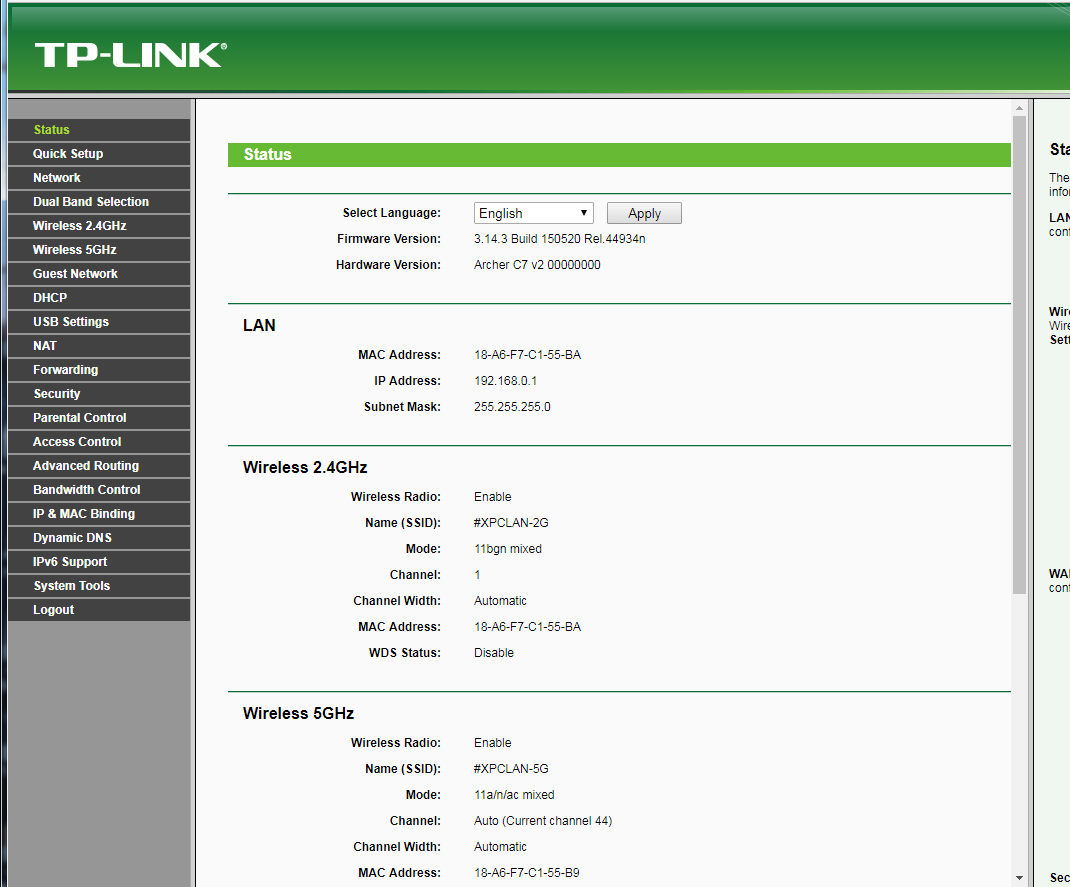
Step 2 – Router Setup
Once logged in, you will be presented with the Router Setup Page as seen below.
Step 3 – Configure Network
Navigate to the Menu bar on the left of the screen and select “Network” then click on “WAN“
Step 4 – Configure DNS on WAN
Take note under the WAN selection you will find a section labelled “Primary DNS” and “Secondary DNS“. Enter the two closest DNSFlex DNS Server IP Addresses in these two boxes. The DNS locator map can be found in the DNSFlex Dashboard page. Click “Save” when complete.
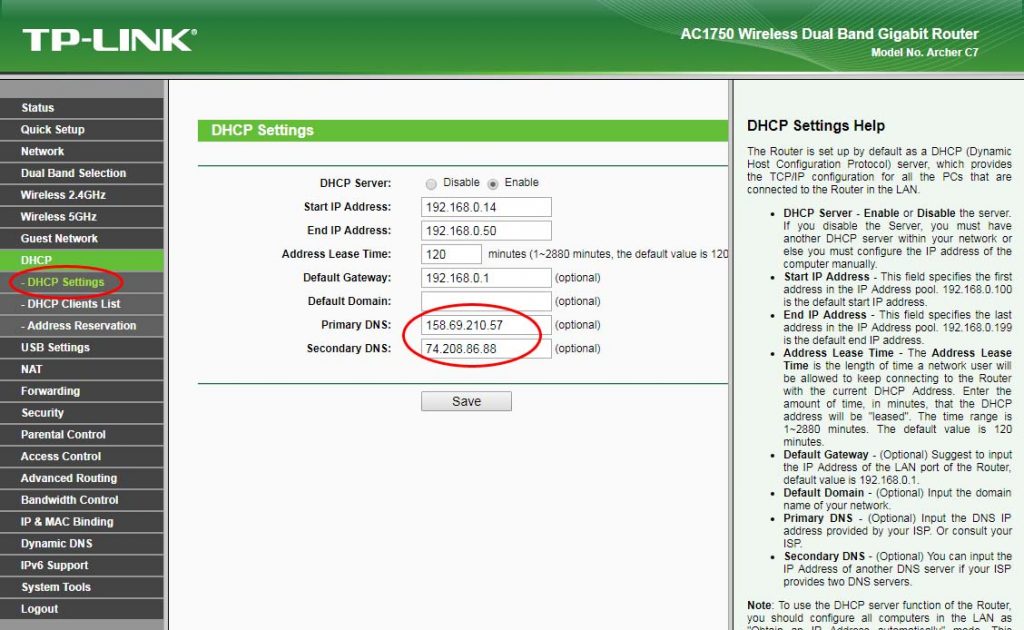
Step 5 – Configure DNS on LAN
Navigate to DHCP -> DHCP Settings. You will find a section labelled “Primary DNS” and “Secondary DNS“. Enter the two closest DNSFlex DNS Server IP Addresses in these two boxes. The DNS locator map can be found in the DNSFlex Dashboard page. Click “Save” when complete.
Note: Whenever making any manual changes to your network connectivity it is always best practice to reboot your device in order for the changes to propagate. Please proceed to reboot your TP-Link Router following this tutorial. Congratulations, you are now fully setup to use DNSFlex services!