


Android DNS Configuration
Note: If you don’t root permission on your device, you have to face some limitations of the Android system. First, changing the DNS settings will only affect your current Wi-Fi network connection. There is no option available to change the DNS settings for your 3G/4G data networks connection. Second, you must change the DNS server settings for each Wi-Fi network you want to connect to.
Step 1
Open the Settings on the device
Step 2
Select “Wi-Fi”
Step 3
Long press your current network, then select “Modify network”
Step 4
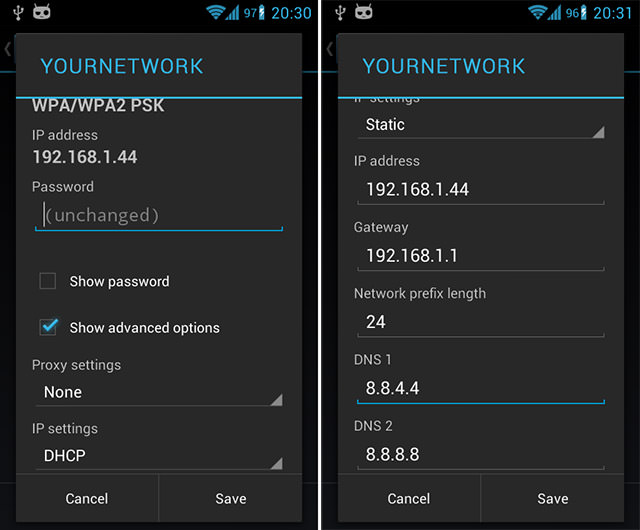
Mark “Show advanced options” check box
Step 5
Change “IP settings” to “Static”
Step 6
Add the two closest DNSFlex servers IP’s to the “DNS 1”, and “DNS 2” fields respectively. Typically your Routers default gateway will be 192.168.1.1 depending on the vendor, you can configure the existing DHCP IP address as static as you wish.
Step 7
Press “Save” button, disconnect from the network, and reconnect for changes to take effect
Step 8
Test your new DNS servers by visiting the DNSFlex Dashboard validation page
Change the DNS settings if you have root permissions
If you have rooted your Android device, you can use free and simple DNS Changer application. With DNS Changer you can quickly set DNS servers IP manually or select them from a list of DNS providers. You can set program to automatically apply these settings both to Wi-Fi and 3G/4G data connection.