


iPhone DNS Configuration
Note:
Before we start, you should know a couple things about how iOS handles DNS. First, these instructions only work for Wi-Fi connections – iOS does not allow you to change the DNS servers when connected to cellular networks. Also, the changes are network specific, so you’ll need to change the DNS servers every time you connect to a new wireless network. The good news is that iOS remembers the settings, so you won’t have to do anything the second time you connect to a network.
Step 1:
Open the Settings app on your device, and tap on the Wi-Fi menu.
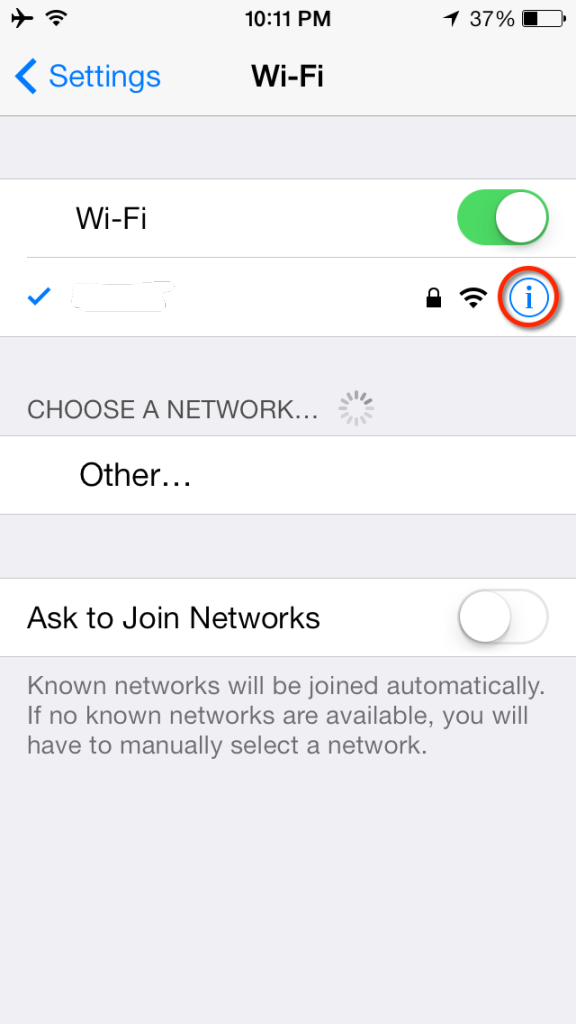
Step 2:
Find out your Wi-Fi connection from the list of available networks, and tap on the ibutton on the right.
Step 3:
Scroll down until you see the DNS section, and tap on the numbers to the right.
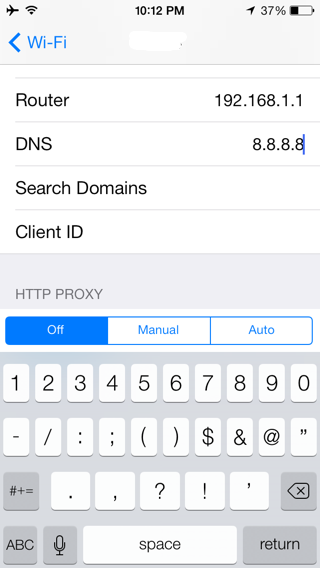
Step 4:
A keyboard should appear, and you can now enter the two closest DNSFlex server address. Tap on Wi-Fi to go back, once you’re done.
Step 5:
Test your new DNS servers by visiting the DNSFlex Dashboard validation page